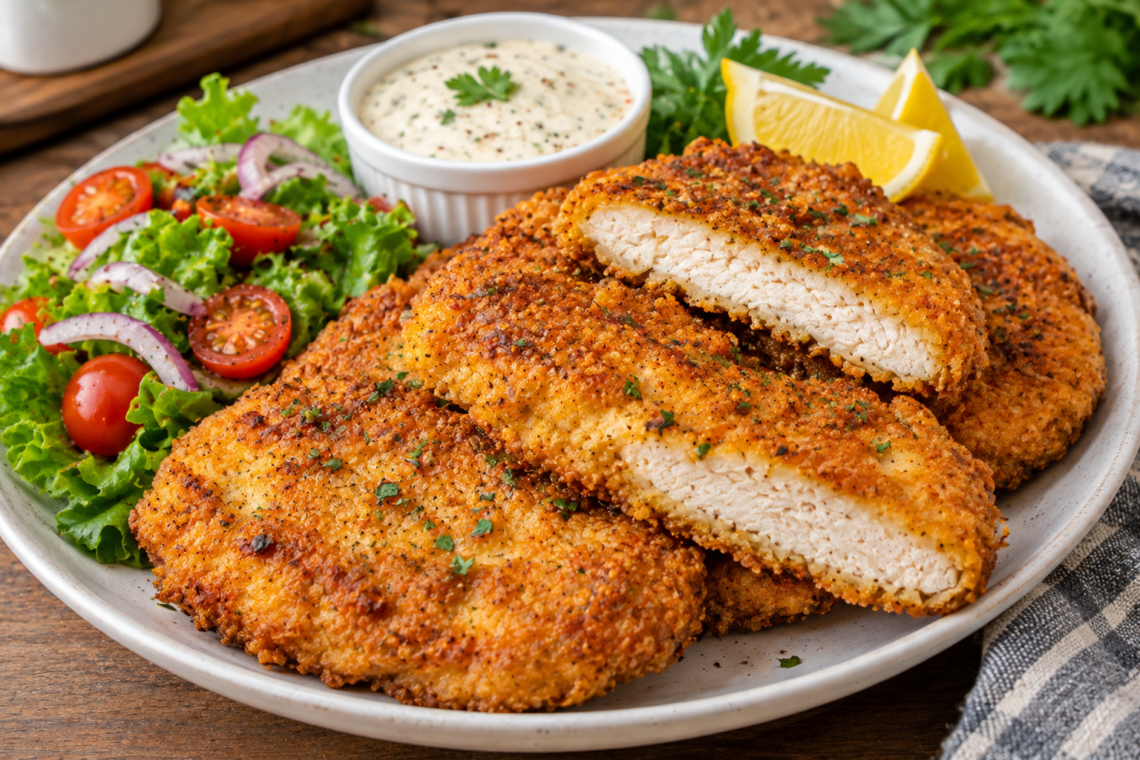
Crispy Chicken Cutlets are thin, tender chicken breasts coated in seasoned breadcrumbs and fried until golden brown and crunchy. They are easy to prepare, full of flavor, and perfect for lunch, dinner, sandwiches, or meal prep.
Recipe Details
– Prep Time: 20 minutes
– Marinating Time: 15–30 minutes (optional)
– Cook Time: 15–20 minutes
– Total Time: 35–40 minutes, excluding optional marinating
– Servings: 4
– Cuisine: American-inspired
– Course: Lunch or Dinner
– Difficulty: Easy
– Cooking Method: Pan-frying
– Yield: 4 large chicken cutlets
Ingredients
For the chicken
– 2 large boneless, skinless chicken breasts (about 600–700 g)
– 1 teaspoon salt, or to taste
– 1 teaspoon paprika
– ½ teaspoon freshly ground black pepper
– 1 teaspoon garlic powder
– ½ teaspoon onion powder
– ½ teaspoon dried oregano
– 1 tablespoon lemon juice
– 1 tablespoon olive oil (optional)
For the breading station
– ½ cup (60 g) all-purpose flour
– 2 large eggs
– 2 tablespoons milk
– 1 cup (100–120 g) plain breadcrumbs or panko breadcrumbs
– ¼ cup (25 g) finely grated Parmesan cheese (optional)
– ½ teaspoon paprika
– ½ teaspoon garlic powder
– ¼ teaspoon black pepper
– ¼ teaspoon salt, or to taste
For frying
– ½–¾ cup (120–180 ml) neutral cooking oil, such as canola, sunflower, or vegetable oil, as needed for shallow-frying
For serving (optional)
– Lemon wedges
– Fresh parsley, chopped
– Fresh salad or steamed vegetables
– Ketchup, mayonnaise, garlic sauce, or honey mustard
Equipment Needed
– Sharp knife
– Cutting board
– Meat mallet or rolling pin
– Three shallow bowls or plates
– Large frying pan
– Tongs
– Paper towels or a wire rack
– Food thermometer, if available
Instructions
1. Prepare the chicken
Place each chicken breast on a clean cutting board. Carefully slice it horizontally into two thinner pieces. Depending on the size of the breasts, you can also cut them into smaller portions to make four evenly sized cutlets.
Place the chicken pieces between two sheets of baking paper or plastic wrap. Gently pound them with a meat mallet or rolling pin until they are approximately ¼ inch (6 mm) thick.
Try to keep the thickness even so that every cutlet cooks at the same rate without drying out.
2. Season the chicken
In a small bowl, combine the salt, paprika, black pepper, garlic powder, onion powder, and oregano.
Rub the seasoning evenly over both sides of the chicken. Add the lemon juice and optional olive oil.
Allow the chicken to rest for 15–30 minutes in the refrigerator for better flavor. If short on time, you can proceed directly to breading.
3. Prepare the breading station
Arrange three shallow bowls on your work surface.
– Bowl 1: Add the flour.
– Bowl 2: Whisk the eggs and milk until smooth.
– Bowl 3: Combine the breadcrumbs, Parmesan cheese if using, paprika, garlic powder, black pepper, and salt.
Mix the breadcrumb ingredients thoroughly so the seasonings are evenly distributed.
4. Coat the chicken in flour
Take one seasoned chicken cutlet and coat both sides lightly in flour. Shake off any excess flour.
The thin flour layer helps the egg mixture adhere to the chicken, creating a coating that stays in place during frying.
5. Dip into the egg mixture
Transfer the floured chicken into the beaten eggs and milk. Turn it over so both sides are completely coated.
Allow the excess egg mixture to drip back into the bowl before moving to the breadcrumbs.
6. Coat with breadcrumbs
Place the chicken into the seasoned breadcrumb mixture. Press the breadcrumbs gently onto both sides and around the edges.
For an extra-crispy crust, press firmly enough for the crumbs to adhere without crushing them.
Transfer the coated cutlet to a clean plate or wire rack. Repeat with the remaining chicken pieces.
For an even thicker crust, dip each cutlet into the egg mixture and breadcrumbs a second time.
7. Rest the breaded cutlets
Let the breaded chicken rest for 5–10 minutes before frying. This helps the coating adhere and reduces the chance of it falling off in the pan.
Meanwhile, prepare your serving sides and cut the lemon wedges.
8. Heat the oil
Pour enough oil into a large frying pan to create a shallow layer, approximately ⅛–¼ inch deep.
Heat over medium to medium-high heat. The oil should be hot enough for the breadcrumbs to sizzle immediately when added, but it should not smoke.
If the oil is too cool, the coating can absorb excess oil. If it is too hot, the breadcrumbs may brown before the chicken cooks through.
9. Fry the chicken cutlets
Carefully place one or two cutlets into the hot oil, depending on the size of your pan. Avoid overcrowding.
Fry for approximately 3–5 minutes on the first side, until the underside is golden brown and crisp.
Turn the cutlets carefully with tongs and cook for another 3–5 minutes, depending on thickness.
The chicken is ready when the coating is deeply golden and the thickest part reaches an internal temperature of 165°F (74°C).
Transfer the cooked cutlets to a wire rack or a plate lined with paper towels. Allow excess oil to drain.
Repeat with the remaining cutlets, adding a little more oil if necessary and allowing it to return to the correct temperature between batches.
10. Keep the cutlets crispy
For the crispiest result, place the cooked cutlets on a wire rack rather than stacking them. Stacking traps steam and softens the breading.
If preparing several batches, keep the finished cutlets in a warm oven at approximately 200°F (95°C) until serving.
11. Serve and garnish
Arrange the crispy chicken cutlets on a serving platter. Add fresh parsley and lemon wedges, if desired.
Serve immediately while the crust is crunchy and the chicken remains juicy.
Chef’s Tips for Perfect Chicken Cutlets
– Keep the thickness even: Thin, uniform pieces cook quickly and evenly.
– Dry the chicken first: Patting the chicken dry before seasoning helps the breading adhere.
– Use panko for crunch: Panko breadcrumbs create a lighter, crispier crust than many fine breadcrumbs.
– Season every layer: Light seasoning in the chicken and breadcrumb coating produces better flavor.
– Avoid overcrowding: Frying too many pieces at once lowers the oil temperature.
– Flip only when ready: Allow the crust to develop before turning the cutlet.
– Drain properly: A wire rack helps preserve crispness.
– Use a thermometer: Chicken must reach 165°F (74°C) internally for food safety.
Oven-Baked Version
For a lighter alternative, you can bake the breaded chicken cutlets.
1. Preheat the oven to 425°F (220°C).
2. Line a baking tray with baking paper and lightly grease it.
3. Arrange the breaded cutlets in a single layer.
4. Spray or brush the tops lightly with oil.
5. Bake for approximately 15–20 minutes, turning halfway through.
6. Check that the thickest part reaches 165°F (74°C). Cooking time depends on thickness.
The oven-baked version can be crisp, although shallow-frying generally produces a more evenly golden crust.
Air-Fryer Version
1. Preheat the air fryer to 400°F (200°C), if your model requires preheating.
2. Lightly spray both sides of the breaded cutlets with oil.
3. Arrange them in a single layer without overlapping.
4. Air-fry for approximately 8–12 minutes, turning halfway through.
5. Check that the chicken reaches an internal temperature of 165°F (74°C).
Thicker cutlets may need additional cooking time.
Serving Suggestions
These crispy chicken cutlets pair well with:
– Creamy mashed potatoes
– French fries or roasted potato wedges
– Fresh cucumber and tomato salad
– Coleslaw
– Steamed broccoli or green beans
– Buttered rice or rice pilaf
– Garlic mayonnaise or honey mustard sauce
– Toasted sandwich rolls with lettuce and tomato
For a complete meal, serve one cutlet with roasted vegetables and a fresh salad.
Storage and Reheating
Refrigeration: Allow the chicken to cool slightly and refrigerate it in an airtight container within 2 hours of cooking. Use within 3–4 days.
Freezing cooked cutlets: Cool completely, separate the pieces with baking paper, and freeze in a freezer-safe container for up to 2–3 months for best quality.
Reheating: Reheat in an oven at 375°F (190°C) for approximately 8–12 minutes, or in an air fryer at 350°F (175°C) for 4–7 minutes, until hot throughout. Check that reheated leftovers reach 165°F (74°C). Microwaving is convenient but can soften the crust.
Make-ahead tip: Bread the raw cutlets, arrange them in a single layer, and refrigerate covered for several hours before cooking. For longer storage, freeze them in a single layer before transferring to a freezer bag. Cook frozen raw cutlets only when they can be cooked thoroughly and safely; avoid leaving them at room temperature to thaw.
Nutrition Information
Estimated nutrition per serving, assuming 4 servings, including the breading, Parmesan, eggs, and a portion of absorbed frying oil. Actual values vary by ingredients and cooking method.
Nutrient Approximate amount per serving
Calories 450–550 kcal
Protein 42–50 g
Total carbohydrates 25–32 g
Dietary fiber 1–3 g
Total sugars 2–4 g
Total fat 18–27 g
Saturated fat 3–6 g
Cholesterol 160–210 mg
Sodium 650–950 mg
Oven-baking or air-frying with less oil will generally reduce the total fat and calories. Serving sauces and side dishes will add to the nutritional totals.
Allergen Information
– Eggs: Present in the breading.
– Wheat/gluten: Present in all-purpose flour and regular breadcrumbs.
– Milk/dairy: Present if using milk and Parmesan cheese.
– Soy: May be present in some commercial breadcrumbs or cooking oils; check the ingredient labels.
– Cross-contact: Check packaging if preparing food for someone with an allergy.
Substitution options:
– For gluten-free cutlets, use gluten-free flour and breadcrumbs.
– For dairy-free cutlets, omit the Parmesan and replace the milk with an unsweetened, unflavored alternative or water.
– For an egg-free coating, use a suitable commercial egg replacer designed for breading, checking its allergen information.
Frequently Asked Questions
Why does my breading fall off?
The chicken may be too wet, the flour layer may be too thick, or the cutlets may not have rested after breading. Pat the chicken dry, shake off excess flour, press the breadcrumbs onto the surface, and rest for 5–10 minutes.
How do I make chicken cutlets extra crispy?
Use panko breadcrumbs, maintain medium to medium-high heat, avoid overcrowding the pan, and drain the cutlets on a wire rack.
Can I prepare chicken cutlets without Parmesan?
Yes. Parmesan is optional. The cutlets will still be flavorful if you season the breadcrumbs with garlic powder, paprika, black pepper, and oregano.
Can I use chicken thighs instead of breasts?
Yes, boneless, skinless chicken thighs can be flattened to a uniform thickness. They may need slightly different cooking times, so always verify that the center reaches 165°F (74°C).
Can I make these cutlets spicy?
Yes. Add ½–1 teaspoon cayenne pepper or extra chili powder to the chicken seasoning or breadcrumb mixture.
How do I know when the cutlets are cooked?
The safest method is to check the thickest part with a food thermometer. It should reach 165°F (74°C). A golden crust alone does not guarantee that the chicken is cooked through.
Can I make the cutlets ahead for a party?
Yes. Cook them in batches and keep them on a wire rack in a warm oven. Serve as soon as possible for the best crunch.
Final Recipe Note
These crispy chicken cutlets are a dependable homemade favorite: crunchy on the outside, tender on the inside, and easy to customize with your favorite herbs and spices. Serve them fresh with lemon wedges, a creamy dipping sauce, and your favorite sides for a satisfying family meal.

With years of experience in restaurant research and local SEO, Sara creates accurate, user-friendly guides that work for both people and search engines. Her goal is to help users go from search results to their nearest restaurant or menu choice with as few clicks as possible.
- Grandma’s Chocolate Chip Cheesecake Cookies - October 28, 2026
- Hearty Lentil, Potato & Spinach Soup - October 28, 2026
- Creamy White Chicken Chili - October 28, 2026