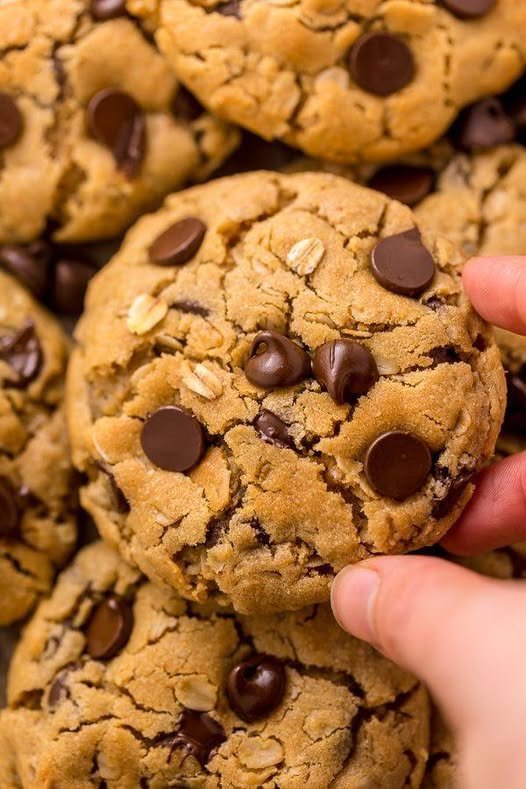
Soft, chewy oatmeal cookies packed with peanut butter, chocolate chips, and crunchy peanuts. These cookies have crisp edges, a tender center, and plenty of texture in every bite.
Ingredients
Dry Ingredients
1½ cups old-fashioned rolled oats
1 cup all-purpose flour
½ teaspoon baking soda
½ teaspoon baking powder
½ teaspoon salt
½ teaspoon ground cinnamon
Wet Ingredients
½ cup unsalted butter, softened
½ cup creamy peanut butter
¾ cup packed brown sugar
¼ cup granulated sugar
1 large egg
2 teaspoons vanilla extract
Mix-Ins
¾ cup semi-sweet chocolate chips
½ cup chopped roasted peanuts
¼ cup milk chocolate chips, optional
¼ cup shredded coconut, optional
2 tablespoons mini chocolate chips, for topping
Flaky sea salt, optional
Instructions
1. Prepare the Oven
Preheat the oven to 350°F (175°C).
Line two baking sheets with parchment paper.
2. Combine the Dry Ingredients
In a medium bowl, whisk together:
Rolled oats
Flour
Baking soda
Baking powder
Salt
Cinnamon
Set aside.
3. Cream the Butter and Sugars
In a large mixing bowl, beat the softened butter, peanut butter, brown sugar, and granulated sugar for about 2–3 minutes.
The mixture should become creamy and slightly fluffy.
4. Add the Wet Ingredients
Beat in the egg and vanilla extract.
Mix until completely combined.
5. Add the Dry Ingredients
Gradually add the dry mixture to the wet mixture.
Mix just until no dry flour remains.
Do not overmix, as this can make the cookies tough.
6. Add the Chocolate & Peanuts
Fold in:
Semi-sweet chocolate chips
Chopped roasted peanuts
Optional milk chocolate chips
Optional shredded coconut
Mix gently until evenly distributed.
7. Chill the Dough
For thicker, chewier cookies, refrigerate the dough for 20–30 minutes.
This step is optional but recommended.
8. Shape the Cookies
Scoop approximately 2 tablespoons of dough for each cookie.
Place the dough balls on the prepared baking sheets, leaving about 2 inches of space between them.
Gently press a few extra chocolate chips and chopped peanuts onto the tops.
9. Bake
Bake for 10–12 minutes.
The edges should look lightly golden while the centers still appear slightly soft.
Do not overbake—the cookies will continue setting as they cool.
10. Cool
Allow the cookies to cool on the baking sheet for 5 minutes.
Then transfer them to a wire rack to cool completely.
For an extra gourmet finish, sprinkle with a tiny amount of flaky sea salt while they’re still warm.
Preparation & Cooking Time
Prep Time: 15 minutes
Chill Time: 20–30 minutes
Bake Time: 10–12 minutes per batch
Total Time: About 50 minutes
Yield: 20–24 cookies
Difficulty: Easy
Approximate Nutrition
Per cookie, assuming 24 cookies:
Calories: 190–210 kcal
Protein: 4–5 g
Carbohydrates: 23–25 g
Fat: 10–11 g
Saturated Fat: 4–5 g
Fiber: 2 g
Sugar: 12–14 g
Sodium: 100–130 mg
Nutrition is approximate and will vary according to the brands and exact quantities used.
Nut & Allergen Information
Contains peanuts: Peanut butter and chopped peanuts are both used in this recipe.
Contains tree nuts: No tree nuts are required in the standard recipe.
Dairy: Contains butter and chocolate chips. Check chocolate labels for milk ingredients.
Gluten: Contains wheat flour. Regular oats are naturally gluten-free but can have cross-contact with wheat during processing. Use certified gluten-free oats and gluten-free flour for a gluten-free version.
Eggs: Contains egg.
Soy: Chocolate chips may contain soy lecithin.
Important Peanut Allergy Note
These cookies are not suitable for anyone with a peanut allergy. If preparing food for someone with a severe allergy, avoid cross-contact with peanut-containing utensils, bowls, baking sheets, and surfaces.
Substitutions
Peanut Butter
You can substitute:
Almond butter
Cashew butter
Sunflower seed butter
If using a different nut or seed butter, the texture may vary slightly.
Chocolate
Use:
Dark chocolate chips
Milk chocolate chips
White chocolate chips
Chocolate chunks
Peanut butter chips
Oats
Old-fashioned rolled oats provide the best chewy texture. Quick oats can be used, but the cookies will be softer and less textured.
Recipe Q&A
Q: Why are my cookies spreading too much?
The butter may have been too warm, or the dough may need more chilling. Refrigerate the dough for 30–45 minutes before baking.
Q: Why are my cookies dry?
They were likely overbaked. Remove them when the edges are golden but the centers still look slightly soft.
Q: Can I make the dough ahead of time?
Yes. Cover the dough tightly and refrigerate for up to 3 days.
Q: Can I freeze the cookie dough?
Yes. Shape the dough into balls, freeze them on a tray, then transfer them to a freezer-safe container for up to 3 months. Bake directly from frozen, adding about 1–3 minutes to the baking time.
Q: Can I freeze baked cookies?
Yes. Cool completely, then freeze in an airtight container for up to 3 months.
Q: Can I use crunchy peanut butter?
Absolutely. Crunchy peanut butter gives the cookies even more peanut texture.
Q: Can I make them without coconut?
Yes. Coconut is completely optional and can simply be omitted.
Q: Can I make smaller cookies?
Yes. Use about 1 tablespoon of dough per cookie and bake for approximately 8–10 minutes.
Q: How do I get extra chewy cookies?
Use brown sugar, avoid overbaking, and allow the dough to chill before baking.
Q: How should I store the cookies?
Store completely cooled cookies in an airtight container at room temperature for 4–5 days.
Q: Can I make these gluten-free?
Yes. Use certified gluten-free oats and a suitable gluten-free 1-to-1 baking flour, and verify that all other packaged ingredients are gluten-free.

With years of experience in restaurant research and local SEO, Sara creates accurate, user-friendly guides that work for both people and search engines. Her goal is to help users go from search results to their nearest restaurant or menu choice with as few clicks as possible.
- Stuffed Cabbage Rolls - October 18, 2026
- Easy Crockpot Creamy Garlic Parmesan Chicken - October 18, 2026
- Turmeric Carrot Lentil Stew - October 18, 2026