Soft & Fluffy Homemade White Bread — Full Recipe
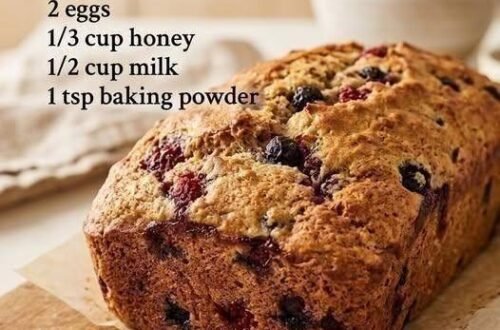
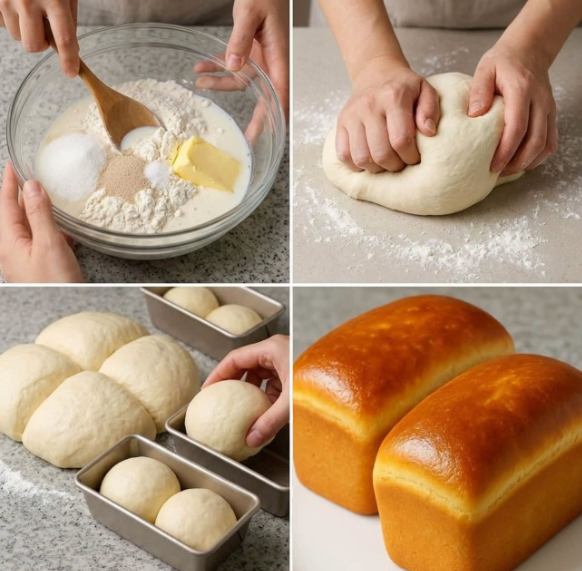
The photo shows a classic soft, enriched white sandwich bread made with flour, milk, yeast, sugar, butter, and salt. The method below makes 2 medium loaves, with a soft, tender crumb and shiny golden-brown crust. Similar classic formulas use milk and butter specifically to produce a softer crumb.
Yield
2 loaves
About 10–12 slices per loaf, depending on thickness
Prep: 25–35 minutes
First rise: 1–1½ hours
Second rise: 40–60 minutes
Baking: 30–40 minutes
Total: approximately 3 hours
Ingredients
Dough
6 cups (720 g) all-purpose or bread flour, plus a little extra if needed
2 cups (480 ml) whole milk, lukewarm
¼ cup (60 ml) warm water
4 teaspoons (about 12–14 g) active dry yeast
¼ cup (50 g) granulated sugar
2 tablespoons (28 g) unsalted butter, melted
1 tablespoon (15–18 g) salt
1 tablespoon vegetable or neutral oil, for greasing the bowl and pans
This ingredient combination is consistent with traditional soft white sandwich-bread formulas using milk, butter, sugar, flour, salt, and yeast.
Optional finish
1 tablespoon melted butter for brushing the baked loaves
1 ablespoon milk for brushing the tops before baking, if you want extra browning
Step-by-Step Instructions
1. Activate the yeast
Put the ¼ cup warm water and about ¼ cup of the lukewarm milk into a small bowl.
Add:
yeast
1 teaspoon of the sugar
Stir gently.
Let stand for 5–10 minutes.
The mixture should become foamy. If it does not foam at all, your yeast may be inactive and should be replaced.
Important: The liquid should be warm, not hot. Excessive heat can damage yeast. A temperature around 100–110°F (38–43°C) is suitable for activating active dry yeast.
2. Prepare the milk mixture
Combine the remaining milk, melted butter, and remaining sugar.
The milk should be lukewarm, not hot.
If you heated the milk, allow it to cool before adding the yeast mixture.
3. Make the dough
In a large mixing bowl, combine about 4 cups (480 g) of the flour with the salt.
Pour in:
Milk/butter mixture
Activated yeast mixture
Mix with a wooden spoon or sturdy spatula.
Gradually add the remaining flour, approximately ½ cup at a time.
Don’t automatically add all the flour.
The finished dough should be:
soft
slightly tacky
elastic
not wet or soupy
soft enough to knead
The amount of flour can vary because of humidity, flour type, and measuring technique.
4. Knead the dough
Turn the dough onto a lightly floured surface.
Knead for approximately 8–12 minutes by hand.
Use this motion:
Push → fold → turn → repeat.
At first the dough may feel sticky. Avoid dumping in large amounts of flour. Add only a tablespoon at a time if absolutely necessary.
How do you know it’s ready?
The dough should become:
smooth
elastic
soft
slightly springy
You can perform the windowpane test: stretch a small piece of dough gently. If it can stretch thin enough for light to pass through without immediately tearing, the gluten has developed well.
5. First rise
Lightly oil a large bowl.
Place the dough inside and turn it once so the surface gets lightly coated with oil.
Cover with plastic wrap, a lid, or a clean damp towel.
Place somewhere warm and draft-free.
Let rise for approximately 1–1½ hours, or until substantially doubled/puffy.
The exact time depends on room temperature. Don’t rely solely on the clock—the dough’s appearance is the better indicator. Classic white-bread recipes likewise use a first rise until the dough becomes doubled or very puffy.
6. Deflate and divide
Gently press down on the risen dough to release excess gas.
Turn it onto your work surface.
Divide the dough into 2 equal portions.
For very uniform loaves, weigh the entire dough and divide the weight in half.
Shape each portion into a loose ball.
Cover and let rest for 10–15 minutes.
This short rest relaxes the gluten and makes shaping much easier.
7. Shape the loaves
Take one portion of dough.
Flatten it gently into a rectangle approximately the length of your loaf pan.
Fold the left and right sides toward the center.
Press gently to seal.
Then roll the dough up tightly from one end to the other.
Pinch the final seam closed.
Place seam-side down into a greased loaf pan.
Repeat with the second portion.
Recommended pans
Use approximately:
9 × 5-inch loaf pans
or
8½ × 4½-inch loaf pans
The dough should fill the pans comfortably without being packed tightly.
8. Second rise
Cover the pans loosely.
Let the dough rise for approximately 40–60 minutes.
It should become visibly puffy and approach the top of the pans.
Don’t wait until it becomes dramatically overinflated.
A properly proofed loaf should feel light and airy. When gently pressed with a fingertip, the indentation should slowly spring back.
9. Bake
Preheat your oven to:
350°F (175°C)
Place the loaves on the middle rack.
Bake for approximately 30–40 minutes.
The tops should be a deep golden brown.
For the most reliable result, the center of the bread should reach approximately 190–200°F (88–93°C).
If the tops become brown too quickly, loosely cover them with aluminum foil during the latter part of baking.
10. Finish
Remove the loaves from their pans immediately.
Place them on a wire rack.
For an especially soft, buttery crust, brush the tops with a little melted butter while they’re still hot.
Allow the bread to cool for at least 1 hour before slicing.
Cutting very hot bread can compress the crumb and make it seem gummy.
Tips for Extra-Soft Bread
1. Don’t over-flour the dough
This is probably the most important tip.
A little stickiness is normal. Too much flour produces dense, dry bread.
2. Don’t kill the yeast
Milk or water that is too hot can damage the yeast.
3. Knead sufficiently
Under-kneaded dough may produce a loaf that spreads rather than rises.
4. Watch the dough, not the clock
A cold kitchen may require considerably more rising time.
5. Don’t overproof
If the dough rises dramatically beyond the pan and collapses during baking, it was probably allowed to rise too long.
6. Cool before slicing
Give the internal crumb time to finish setting.
How to Use It
This bread is excellent for:
breakfast toast
grilled cheese
peanut-butter sandwiches
French toast
BLTs
turkey/chicken sandwiches
bread-and-butter
toast with jam
breadcrumbs
croutons
Classic sandwich bread is specifically designed around a soft, sliceable crumb suitable for sandwiches and toast.
Storage
Room temperature
Store completely cooled bread in an airtight bag or container for approximately 3–4 days.
Avoid refrigerating it unless necessary; refrigeration can make bread stale faster.
Freezing
For longer storage:
Cool completely.
Slice if desired.
Wrap tightly.
Put into a freezer-safe bag.
Freeze for up to about 1–3 months for best quality.
You can toast individual frozen slices directly.
Ingredient Substitutions
Can I use water instead of milk?
Yes, but the bread will generally be less rich and tender.
Can I use 2% milk?
Yes.
Can I use skim milk?
Yes. You may get a slightly less rich crumb.
Can I use bread flour?
Yes. It can produce a somewhat chewier, stronger loaf.
Can I use all-purpose flour?
Yes—it’s an excellent choice for this recipe.
Can I use instant yeast?
Yes. You can mix instant yeast directly with the dry ingredients rather than activating it first, although activating it first is useful for checking that your yeast is alive.
Can I use fresh yeast?
Yes, but the quantity needs to be adjusted because fresh yeast contains substantially more water than dried yeast.
Can I replace butter with oil?
Yes. Use approximately 2 tablespoons neutral oil. Butter gives the loaf a richer flavor.
Can I replace sugar with honey?
Yes. Honey can be substituted for sugar, though it slightly changes the flavor and moisture.
Nut / Allergen Information
Does this recipe contain nuts?
No.
There are no tree nuts or peanuts in the ingredients.
However, if this is being prepared for someone with a serious nut allergy, check the labels of your:
flour
butter
milk
yeast
any toppings or spreads
for “may contain” / shared-equipment warnings.
Main allergens
This recipe contains:
Wheat/gluten — from flour
Milk/dairy — from milk and butter
It does not inherently contain:
peanuts
tree nuts
eggs
soy
sesame
fish
shellfish
However, commercial products can have cross-contact warnings, so packaged ingredient labels should always be checked for allergy-sensitive preparation.
Approximate Nutrition
Nutrition varies according to the exact flour, milk, butter, loaf size, and slice thickness.
If the two loaves are divided into approximately 20–24 slices total, each slice will generally be in the neighborhood of:
Calories: ~140–180 kcal
Carbohydrates: ~25–30 g
Protein: ~4–5 g
Fat: ~3–5 g
Fiber: ~1 g
Sugar: ~2–4 g
Sodium: ~200–300 mg
These are estimates, not laboratory nutrition values.
Recipe Q&A
Why is my bread dense?
Common causes are:
too much flour
insufficient kneading
inactive yeast
insufficient rising time
dough that was too cold
overproofing followed by collapse
The dough should become soft and elastic during kneading.
Why didn’t my bread rise?
Check the yeast first.
If the yeast mixture never became active/foamy, the yeast may have been expired or exposed to excessively hot liquid.
Also check your room temperature—bread rises much more slowly in a cold kitchen.
Why is my bread dry?
Usually, too much flour.
Measure flour by weight when possible. King Arthur’s recipes specifically recommend weighing flour or using the spoon-and-level method because flour measurement affects dough consistency.
Why did my loaf collapse?
It may have been overproofed.
The second rise should stop when the dough is nicely puffy rather than allowing it to rise excessively.
Why is the crust too hard?
Try:
brushing with butter immediately after baking
avoiding excessive baking time
not leaving the loaf exposed while cooling
Why is the bottom of my bread hard?
Your oven may be running hot, the pan may be too close to the bottom heating element, or the loaf may have baked too long.
Can I make one large loaf instead of two?
Yes. Divide the recipe in half for one loaf, or put the full quantity into a sufficiently large pan. Don’t crowd the dough into a small pan.
Can I make dinner rolls from this dough?
Absolutely. After the first rise, divide the dough into 12–16 pieces, shape into balls, arrange in a greased baking pan, allow to rise until puffy, and bake at 350°F/175°C until golden, usually around 18–25 minutes depending on size.
Can I prepare the dough the night before?
Yes. After the first rise, you can cover the dough and refrigerate it. Bring it out, shape it, allow it to warm and complete its second rise, then bake. Cold fermentation can also develop additional flavor.
The key to getting the exact soft texture in the picture
The three biggest factors are a soft dough, adequate gluten development, and correct proofing. Don’t compensate for sticky dough by adding lots of flour. Knead until smooth and elastic, let it become properly puffy during both rises, and remove the loaves from the pans promptly after baking.

With years of experience in restaurant research and local SEO, Sara creates accurate, user-friendly guides that work for both people and search engines. Her goal is to help users go from search results to their nearest restaurant or menu choice with as few clicks as possible.
- Stuffed Cabbage Rolls - October 18, 2026
- Easy Crockpot Creamy Garlic Parmesan Chicken - October 18, 2026
- Turmeric Carrot Lentil Stew - October 18, 2026